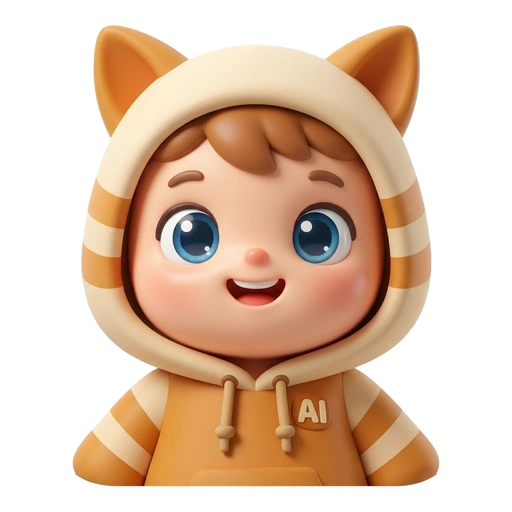

You can create a cartoon character with AI in five practical steps: open the character generator, choose one style, describe the character's identity, review and save the strongest result, then create controlled variations from that saved character. The important step is not generating more pictures. It is turning one approved design into a reusable character reference before you ask for new poses, expressions, or backgrounds.
This guide follows the real workflow in the AI cartoon character generator. You will see how to design an original red panda named Pip, save the result as a Character Asset, and direct variations without rewriting the character from scratch.
What Are You Creating: an Image or a Reusable Character?
A good-looking character image and a reusable character are related, but they are not the same deliverable.
A single image only needs to work in one frame. A reusable character needs a recognizable identity that can survive a different pose, expression, camera distance, or setting. That identity may include the shape of the face, body proportions, hair or fur, clothing colors, and one memorable accessory.
| Deliverable | Main goal | Best next step |
|---|---|---|
| One cartoon portrait | Make one finished image | Download or edit the image |
| Original character | Establish a recognizable visual identity | Save the strongest result as a Character Asset |
| Recurring story character | Reuse the identity in different scenes | Create controlled variants from the saved asset |
This distinction changes how you work. If you only need an avatar, you can stop after approving one image. If you need a mascot, comic lead, Storybook protagonist, or recurring social character, plan for reuse from the beginning.
Plan the Character Before You Generate
Before opening the tool, write down four kinds of information. Keep this short enough that you can compare every result against it.
Identity anchors
Identity anchors are the visible details that should remain recognizable across variations. For Pip, the anchors are:
- small red panda with soft rust-red fur;
- cream-colored face and bright, curious eyes;
- striped fluffy tail;
- forest-green knitted scarf;
- friendly, gently rounded proportions.
Choose three to five anchors. Too few leave the design generic. Too many can turn the prompt into a list of tiny constraints that compete for attention.
Personality
Personality helps you choose posture and expression. “Friendly and curious” is more visually useful than a full fictional biography. It suggests open posture, alert eyes, and approachable expressions without forcing several actions into one image.
Intended use and first view
Decide where the character will appear, then start with a clear design view. A front-facing or three-quarter full-body pose on a simple background makes proportions, clothing, and signature details easier to judge. You can add action after approving the identity.
How to Create a Cartoon Character with AI Step by Step
1. Open the character generator
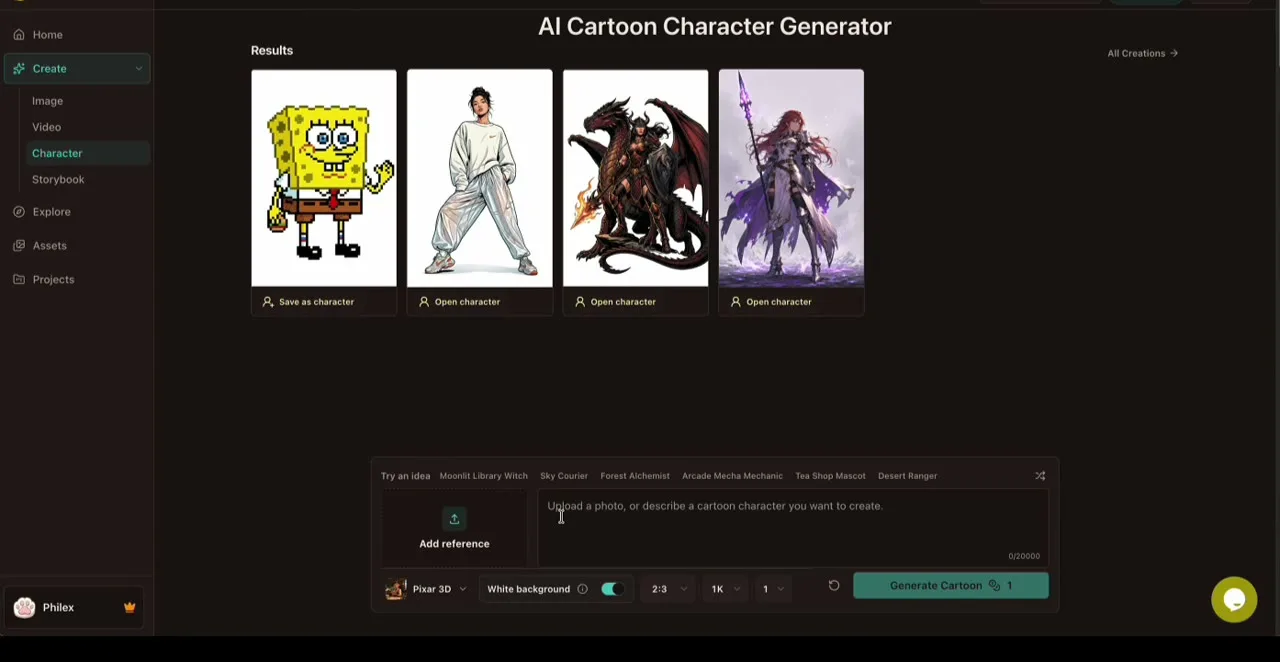
Open the cartoon character creator and select Character in the Create navigation. The input accepts either a written description or a reference image.
Use text when the character begins as an idea. Add a reference when you own or have permission to use an image that contains useful visual information. A reference may help communicate a face, outfit, or existing original design, but it does not remove the need for a clear instruction about what you want to create.
For this tutorial, we start from text so the character is original and the identity choices are explicit.
2. Choose one visual style
Open the style selector and choose one direction for the first design. The real Character workflow groups styles into collections such as Cartoon & Comic, Anime & Manga, Artistic, and 3D & Playful.

Do not mix several style names in the character description. If you select a style preset, let the preset carry the visual direction while your prompt defines the subject. “3D anime watercolor comic character” gives the model competing instructions. One selected style plus a concrete character description is easier to review and repeat.
Keep the same style while establishing the character. Changing the style, body proportions, clothing, and pose at the same time makes it difficult to know whether the identity is actually stable.
3. Describe the character, not the whole story
A useful first prompt describes the character's physical identity, one personality cue, and the neutral presentation you need. Use this formula:
[character type] + [face or body traits] + [signature colors and clothing] +
[personality cue] + [simple pose and background]
The tutorial example is:
A small red panda who lives in a peaceful forest, with soft rust-red fur, a
cream-colored face, bright curious eyes, a striped fluffy tail, and a cozy
forest-green knitted scarf. Friendly and gentle personality, slightly rounded
proportions, clear full-body character design, standing naturally and facing
the camera, simple woodland setting, clean silhouette, no text, no logo.
Notice what the prompt does not include. It does not ask Pip to run, wave, cook, and explore in the same frame. It does not describe an entire story. It gives the generator one job: establish a readable base design.
Adobe's inspected guide to its own AI character generator uses the same broad principle: describe appearance and personality, then refine the result. The exact controls vary by product, but concrete visual details are more actionable than hype words such as “perfect” or “masterpiece.”
Before generating, choose a frame that fits the character. This workflow uses a 2:3 portrait ratio because a full-body character needs vertical room. A square ratio can work for an avatar, while landscape is usually better for a scene than for a neutral character design.
4. Review the result and save the strongest character
Do not save the first result automatically. Open the generated image and review it against the identity anchors you wrote earlier.
Check these points in order:
- Silhouette: Can you understand the character's shape at a glance?
- Face: Are the key facial or species traits clear and usable?
- Proportions: Do the head, body, hands or paws, and tail work together?
- Signature details: Are the important colors, clothes, and accessories present?
- Neutral usability: Can this design plausibly move into a new pose or scene?
- Artifacts: Are there broken details, unwanted text, or distracting background elements?
If the overall concept is wrong, revise the prompt and generate again. If the concept is right but one result is clearly stronger, choose that result as the source of truth.
Select Save as character, give the character a stable name, and write a short character description. The description should record the identity—not the current action or background. In the tutorial, the chosen image becomes Pip the Forest Red Panda.

This saved Character Asset is the bridge between one successful image and future work. It lets you select the approved identity instead of reconstructing Pip from text every time.
5. Create a controlled character variation
Open the saved character, then choose to create a variation. The variation workflow separates changes into Pose, Expression, and Background. That separation matters because it encourages you to change one visual axis at a time.
| Variation type | Keep fixed | Change |
|---|---|---|
| Pose | Identity, outfit, palette, general style | Body position or action |
| Expression | Identity, outfit, pose when possible | Emotional state of the face |
| Background | Character identity and foreground design | Setting or environmental context |
For a first test, choose a simple pose such as waving. Compare it with the original before moving to a more difficult action pose. Ask three questions:
- Is this still obviously the same character?
- Did the requested change happen?
- Did unrelated identity details drift?

AI variation is a guided generation process, not a mathematical guarantee of identical pixels. Review each result against the active reference. If one variant drifts, do not make it the new source of truth. Keep the original approved character active and try a simpler direction.
How to Keep the Character Recognizable
The fastest way to lose a character is to keep redesigning it while asking for consistency. Use the following rules after saving the base asset.
Keep a small identity specification
Store the character name and a short list of anchors outside any single scene prompt. For Pip, “rust-red fur, cream face, striped tail, green scarf, rounded proportions” is enough to audit a result. A long paragraph is harder to scan.
Change one variable per test
Test a pose first, then an expression, then a background. If you request a new outfit, hairstyle, age, camera angle, and location together, you will not know which instruction caused identity drift.
Compare with the original, not the last variation
Variation chains can slowly drift. Treat the approved Character Asset as the reference point. Compare each important result with that original rather than copying whatever happened in the previous image.
Use simple scenes before complex scenes
A waving pose on a clean background is a stronger consistency test than a crowded marketplace with several characters and props. Once the simple test works, add complexity in layers.
Know when to regenerate
Regenerate when the face, proportions, outfit, or signature accessory no longer matches. Use a targeted variant when the identity is sound and you only need a new pose, expression, or background.
When the character is ready for a full scene, you can also select the saved asset inside the broader image workflow. The companion tutorial on how to create AI cartoon images explains how to combine a saved character with a new action, setting, and composition.
A Controlled Consistency Test: One Character, Four Changes
Consistency claims are easy to make and hard to check. The fix is a small repeatable test: take one saved character, change exactly one thing at a time, and review every result against the same base reference. This is the controlled test we ran with Pip, and it is the protocol you can reuse with your own characters.
| Test | The instruction changes | Held constant | What you record |
|---|---|---|---|
| 1 · Pose | One action, such as "waving" | Identity, outfit, style, framing | Silhouette and identity anchors |
| 2 · Expression | One emotional state, such as "laughing" | Identity, pose, background, style | Face and expression readability |
| 3 · Background | One new setting, such as "city street" | Identity, pose, expression, scale | Character edges against the new scene |
| 4 · Video | One simple action in motion | Identity, proportions, signature details | Identity stability across frames |
The setup matters more than the model. We regenerated Pip from the exact prompt in step 3, saved the strongest result as the active Character Asset, and then ran every test from that same saved reference — never from the previous variation. All four tests used the same generation model and the same 2:3 portrait ratio. The only variable in each test was the single change requested in the instruction.
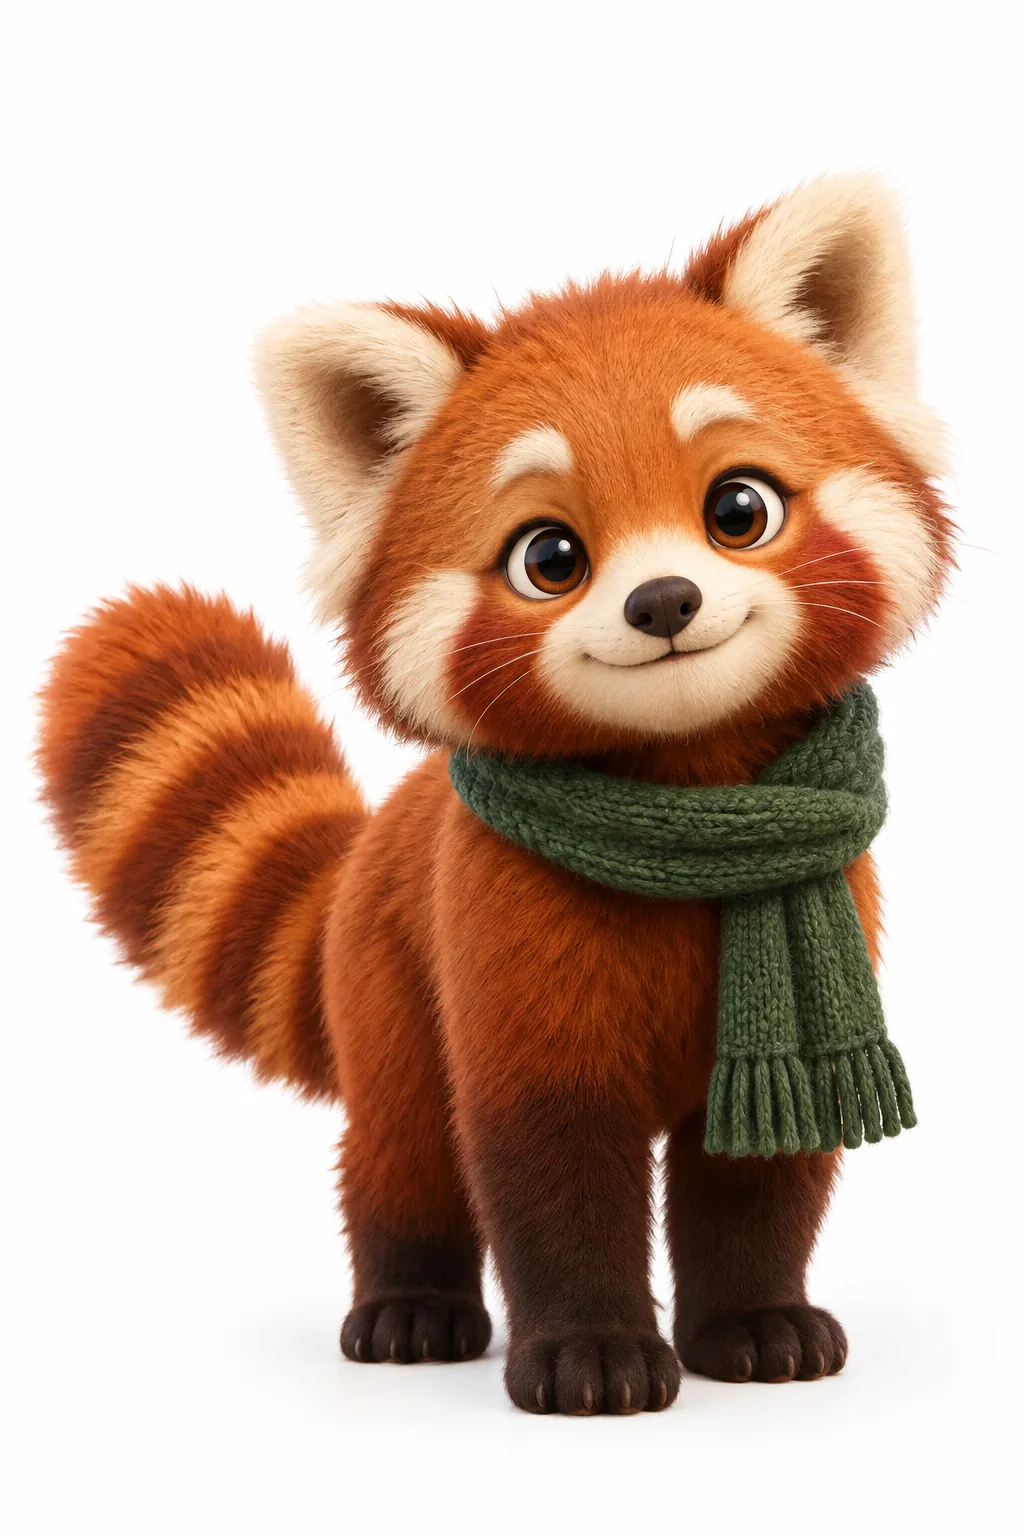 Base · the saved Character Asset every test is compared against | 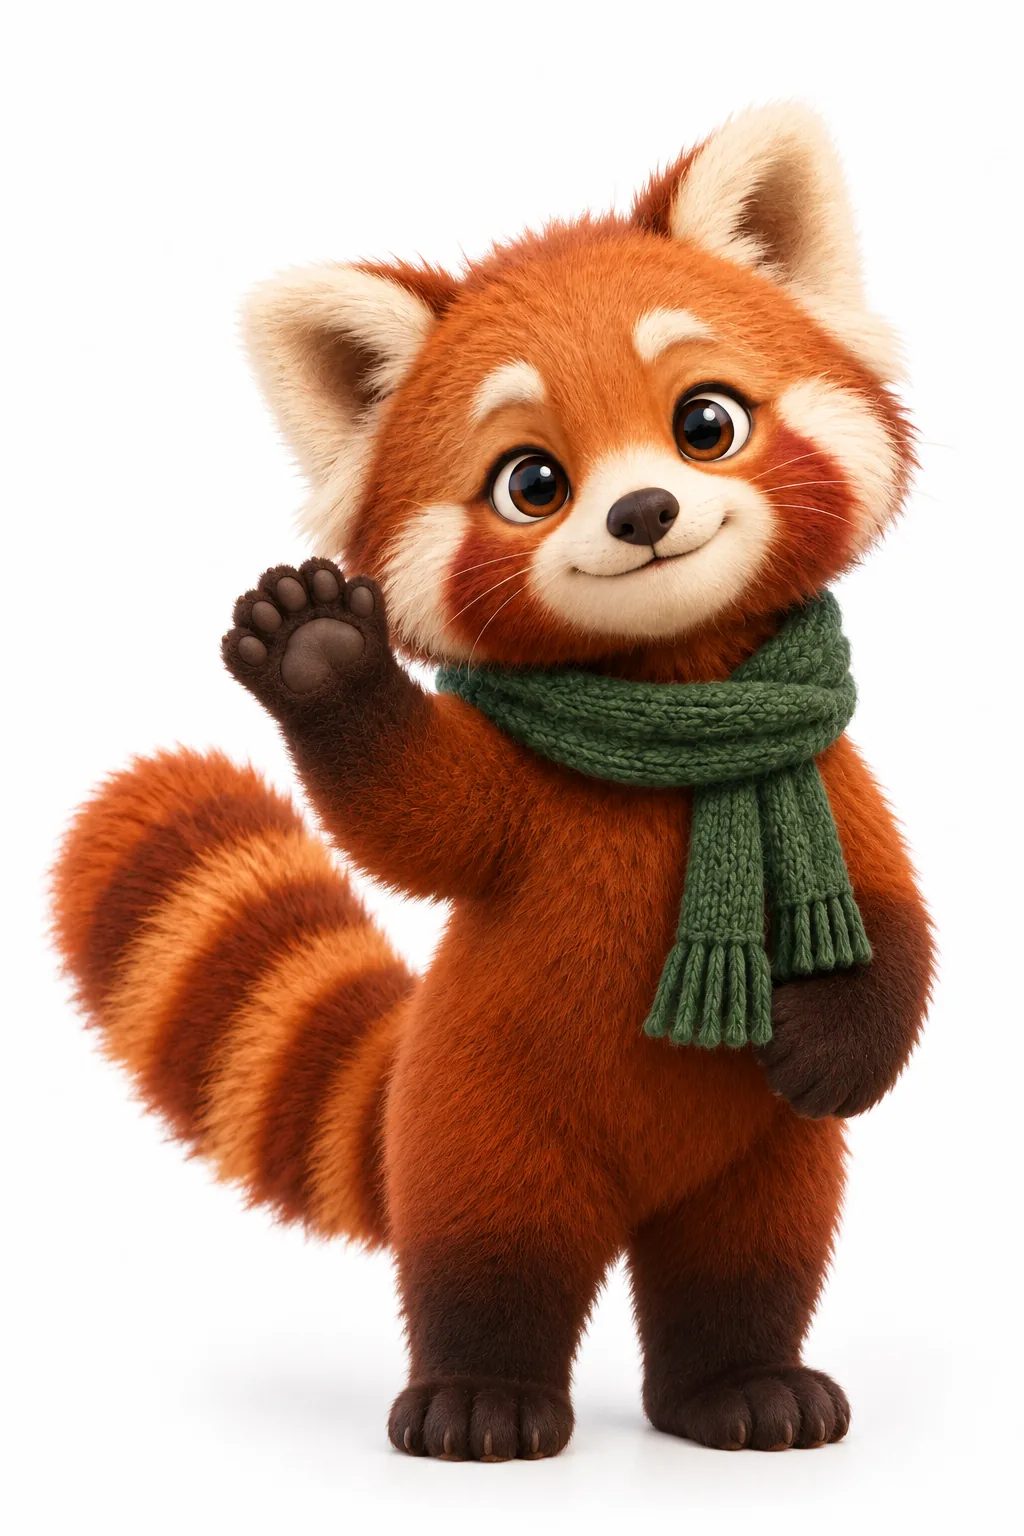 Test 1 · Pose · waving — body position changed, identity untouched |
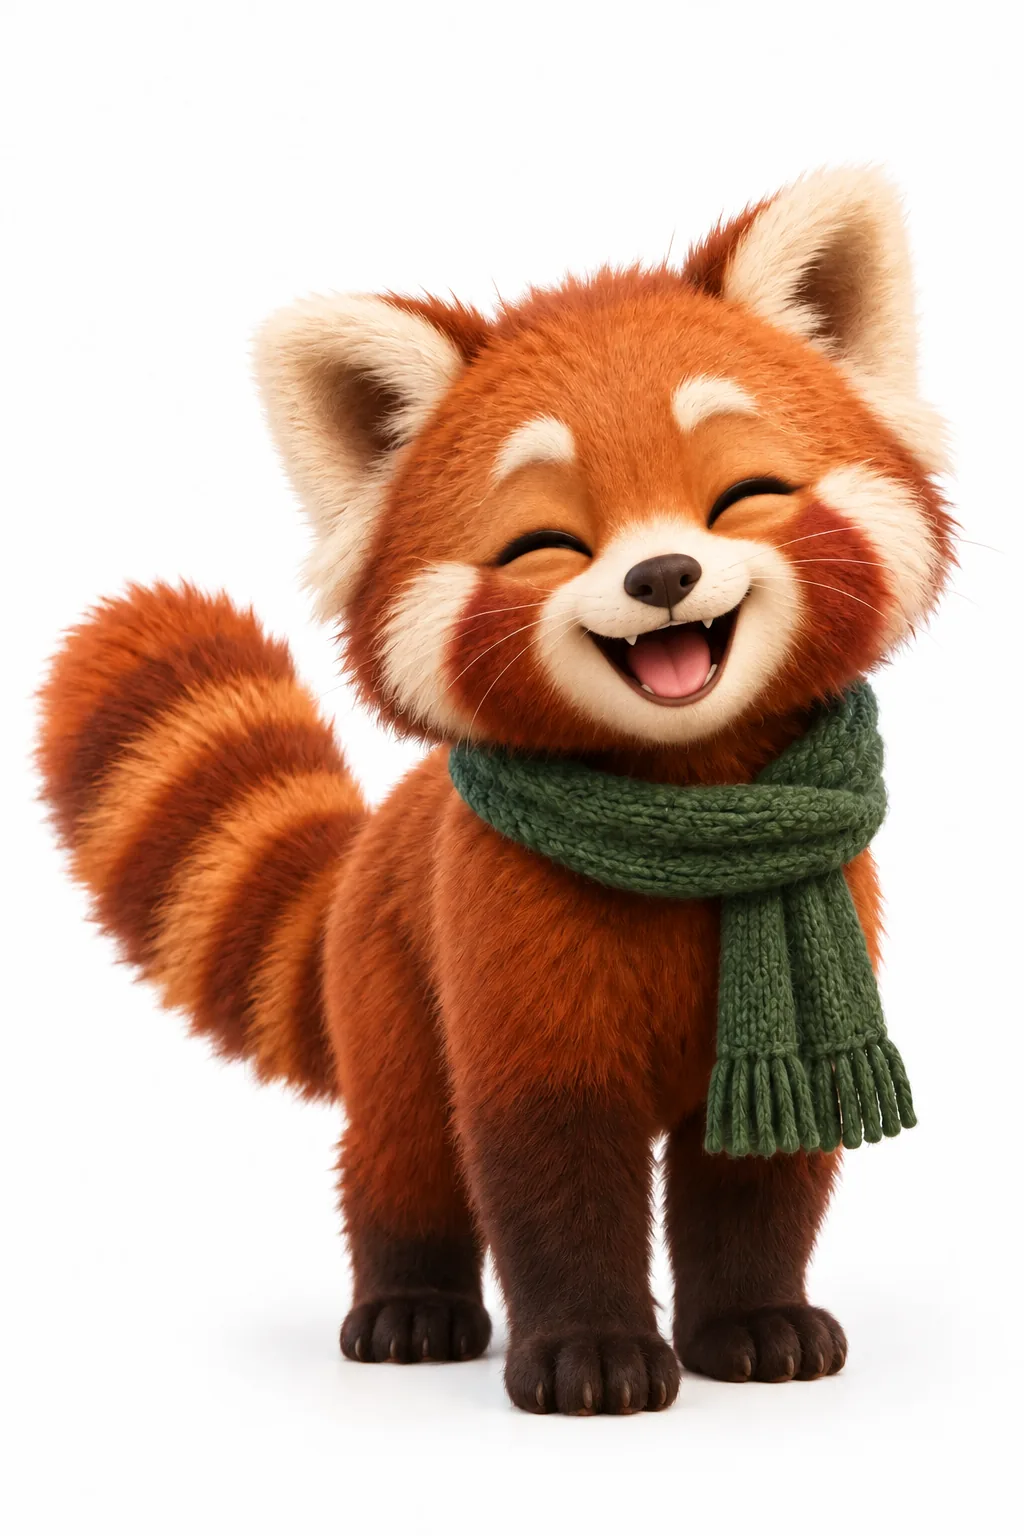 Test 2 · Expression · laughing — only the emotional state changed | 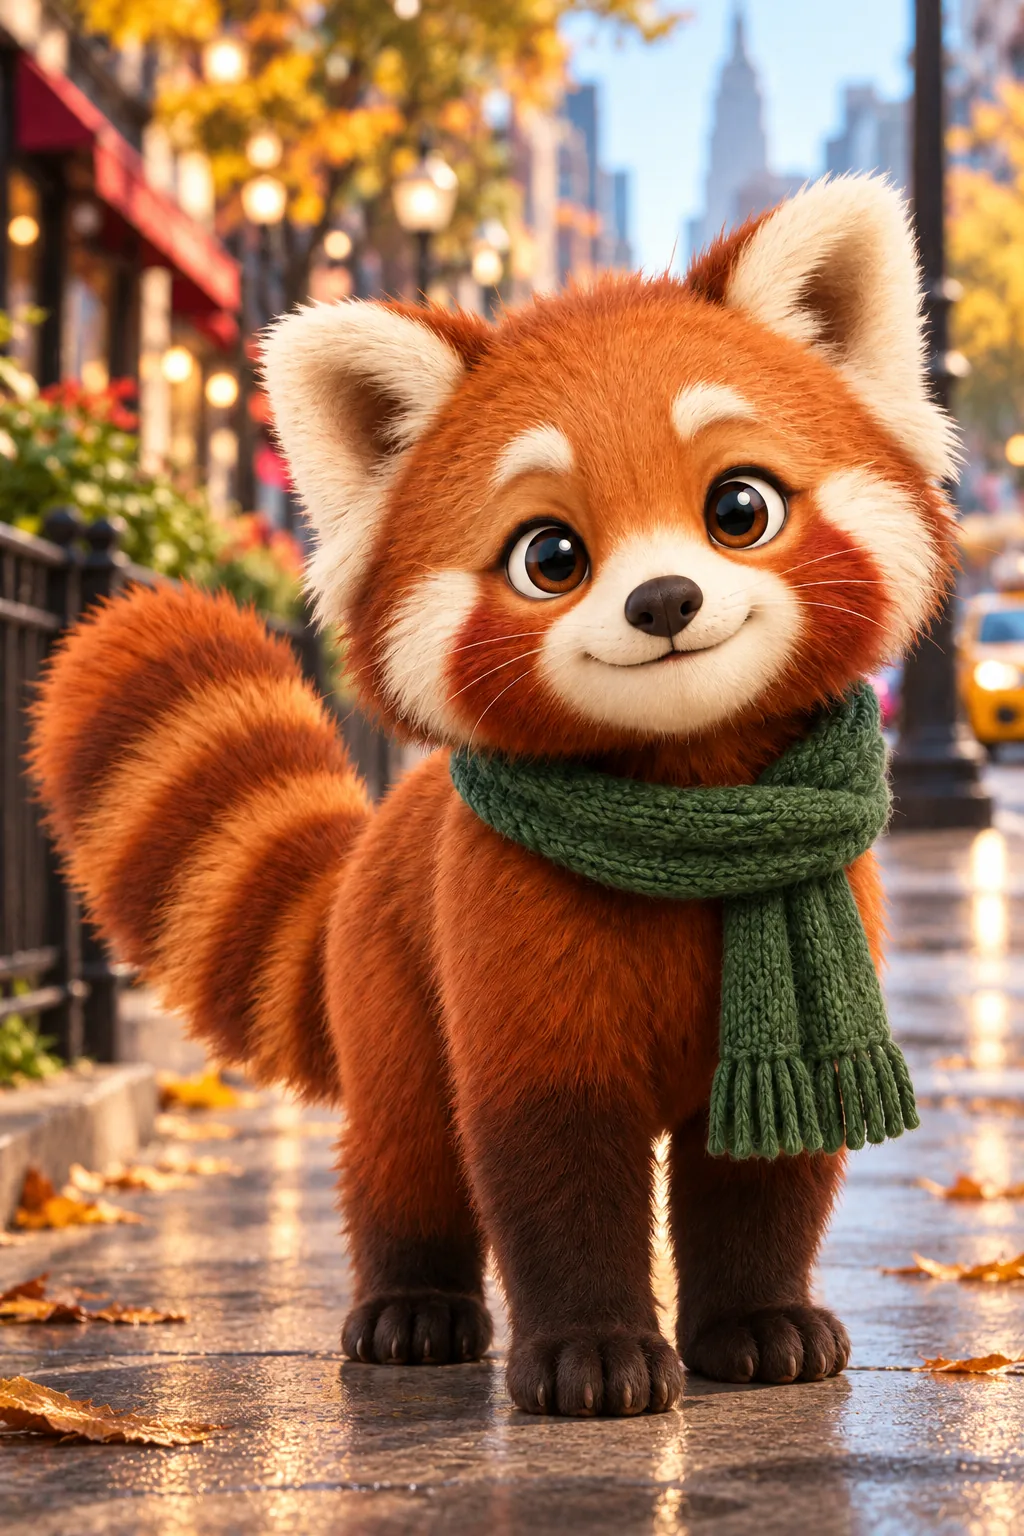 Test 3 · Background · city street — setting replaced, character preserved |
Across the three still tests, the anchors held: rust-red fur, cream face, striped tail, green knitted scarf, and rounded proportions stayed recognizable in every result. Finer details were reinterpreted rather than copied — knit texture and fur clumping render a little differently each time. That is the realistic promise of consistency: a recognizable identity that survives changes, not pixel-identical output.
The fourth test moves the same saved character into video. We gave the workflow the saved Pip as the reference and one simple action — a friendly wave and two steps forward — and generated an eight-second clip.
Video is a consistency test with motion added. The scarf, colors, and proportions carried through the clip, but each generation is a new performance: timing, camera, and secondary motion differ every run. Review a clip the same way you review a still — against the base character, not against your memory of the prompt. This reference-driven approach is the same direction the wider industry has taken; Runway's Gen-4 References research note describes using reference imagery to hold a character's identity while changing everything around it. If you want to see how one character behaves across flat 2D and dimensional 3D animation, the companion comparison in 2D vs 3D animation runs exactly that experiment.
When Consistency Breaks: Two Real Failures
The failures below are real generations from this test session, not illustrations. Both break the "one change at a time" rule on purpose, and both are the kind of result you should learn to reject quickly.
Failure 1: stacking every change into one instruction
The instruction asked for a new body type, a new outfit, a new pose, a new expression, a new background, and a new style at the same time.
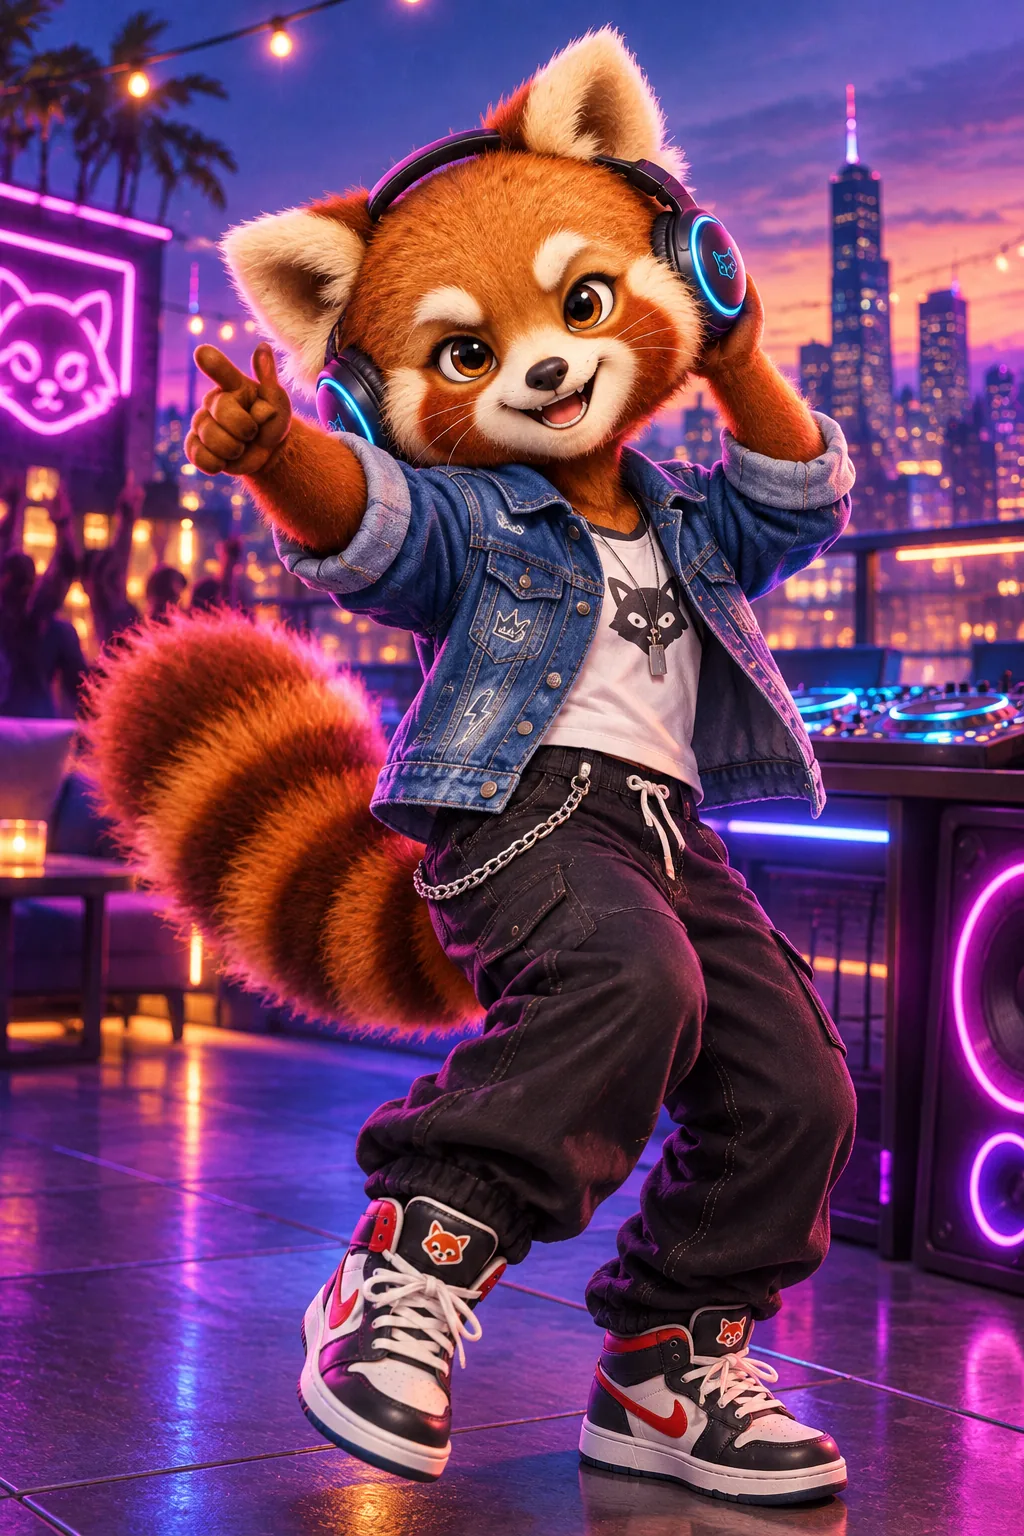
The result is a full redesign. Proportions changed, the scarf identity disappeared under a denim jacket, the lighting and scene belong to a different story. Nothing here is broken as an image — the problem is that it is no longer the same character, so it cannot serve as a variation. When you genuinely need this many changes, either sequence them as single-axis variations or accept that you are creating a new character and save it as one.
Failure 2: competing style words
The instruction mixed four style systems — "anime watercolor 3D pixel comic" — and added new accessories on top.
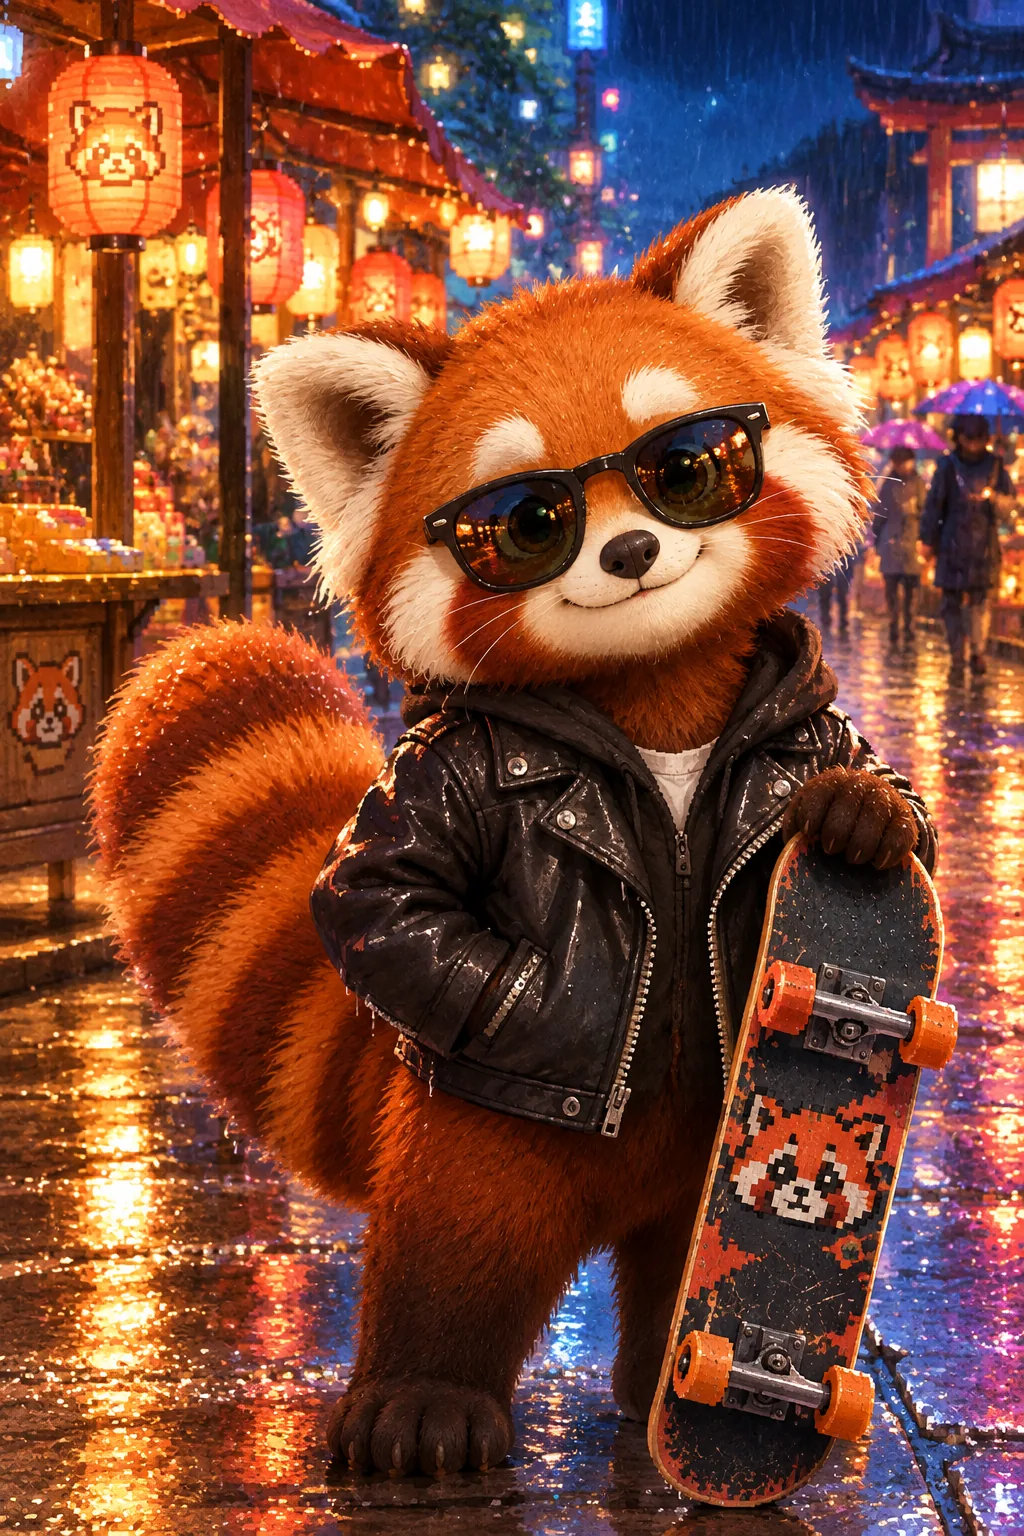
The model did not blend the four styles; it silently picked one and let the leftovers surface as artifacts — a patchy pixelated area on the hat — while the new accessories crowded out the scarf that anchors Pip's identity. Style direction belongs in the style preset, one system at a time. Keep the subject prompt about the subject.
A Reusable Consistency Scorecard
Run this scorecard on every variation before you accept it. It takes under a minute and it catches almost every drift problem early.
| Check | Question | Pass looks like | If it fails |
|---|---|---|---|
| Identity anchors | Are 3–5 anchor details present? | Fur, face, scarf, tail, proportions all readable | Discard; do not build on the result |
| Requested change | Did the one thing you asked for happen? | The pose, expression, or background clearly changed | Retry with a simpler instruction |
| Unrelated drift | Did anything change that you did not request? | Outfit, colors, and framing match the base | Retry; simplify the instruction |
| Artifacts | Extra limbs, text, watermarks, duplicates? | Clean, single coherent subject | Discard and regenerate |
| Scene fit | Does the character sit in the scene believably? | Edges, scale, and lighting agree | Retry with a simpler background |
Accept a result that passes all five. If only the requested change is missing, one retry with simpler wording usually fixes it. If identity anchors fail, never chain the next variation from the drifted result — return to the saved base.
Common Cartoon Character Generation Mistakes
Starting with a complicated action scene
An action scene hides the information you need to judge the base design. Establish the face, silhouette, proportions, and signature details first.
Saving an attractive but unusable result
A dramatic close-up may look impressive but provide little information about the outfit and body. Save a source image that represents the parts you expect to preserve in later work.
Assuming consistency means no review
Generated details can change. Character tools reduce repeated setup, but you still need to compare outputs and reject weak variants. Do not promise a client or production team that every generation will match automatically.
Using a reference without checking rights
Use images you created, own, or have permission to upload. If you use openly licensed material, read the actual license. Creative Commons explains the permissions and conditions in its overview of the six CC license types.
A Note on Originality, Copyright, and Commercial Use
Creating an original-looking character does not automatically settle every rights question. You are responsible for the images you upload, recognizable people or third-party characters you reference, the service terms that apply to your output, and the laws in your jurisdiction.
Commercial permission from a tool and copyright protection are different issues. The U.S. Copyright Office's Artificial Intelligence initiative covers copyright and AI-generated material, including human authorship. For important commercial work, document your creative decisions and get advice appropriate to your location and project.
Avoid asking for a copy of a famous protected character. Build your own identity anchors, name, clothing, color palette, and personality instead.
Frequently Asked Questions
Can AI create a cartoon character from a text description?
Yes. Describe the character type, visible identity traits, signature colors or clothing, a personality cue, and a simple presentation. Start with a neutral full-body view when you plan to reuse the character.
Can I create a cartoon character from a photo?
Yes. Add a reference image you have permission to use, then explain what kind of character you want to create. Use a clear image with one main subject and visible features. Review the result carefully rather than assuming every trait will be preserved.
How do I make the same cartoon character in different poses?
Save the strongest base design as a Character Asset, keep it as the active reference, and create a pose variation. Change only the pose at first, then compare the result with the original character before accepting it.
Why does my AI character look different in every picture?
Usually one of three causes: there is no active character reference, so every prompt rebuilds the design from text; the instruction stacks several changes at once, which quietly redesigns the character; or competing style words fight each other and overwrite identity details. Fix them in order: attach the saved asset, change one thing per generation, and keep style direction in the style preset.
What should I include in an AI cartoon character prompt?
Include the character type, face or body traits, distinctive colors, clothing or accessories, one personality cue, and the intended framing. Let the selected style preset handle style direction instead of mixing several style labels into the prompt.
Do I need drawing skills to make an AI cartoon character?
No. You do need to make design decisions and evaluate the results. A short identity specification and a clear review checklist are more useful than drawing ability for this workflow.
Should I use a character sheet or a saved Character Asset?
Both can help, but they serve different workflows. A character sheet is a visual document showing standardized views and expressions. A saved Character Asset is an active product reference you can select when generating a new variation or scene. Start with the asset when you want to keep creating inside the product; create additional reference views when your wider production process needs them.
Can I use an AI-generated cartoon character commercially?
That depends on the tool terms, your input rights, local law, and how the character is used. Do not assume that the ability to download an image settles copyright, trademark, publicity, or third-party IP questions.
Create the Base Character First
The dependable way to create a cartoon character with AI is to separate design from variation. Define a few identity anchors, choose one style, generate a neutral design, review it, and save the strongest result. Only then ask for a new pose, expression, or background.
Open the AI cartoon character generator and create one clear full-body character. Save the approved design as a Character Asset, test one simple pose variation, and compare it with the original before expanding into scenes, stories, or video.