
A character turnaround sheet is a set of drawings that shows one character from several fixed angles, usually front, three-quarter, side, and back, in the same pose, at the same scale, on one page. Its job is to lock the design: anyone who looks at the sheet can redraw, animate, or generate that character from a new angle without reinventing the proportions, the outfit, or the face.
You need one the moment a character stops living in a single image. The mascot appears in a comic from a different side. The storybook hero turns away from the camera. A client asks for "the back view." Without a turnaround sheet, every new angle becomes a fresh guessing game, and the character drifts.
This guide covers what a professional turnaround contains, the proportion lines that keep views aligned, and a practical AI workflow: build the base design with the AI cartoon character generator, generate each view against that reference, then check the results against a short acceptance list before you call the sheet done. The same discipline works whether you draw the sheet by hand, generate it with AI, or mix the two.
What a character turnaround sheet actually contains
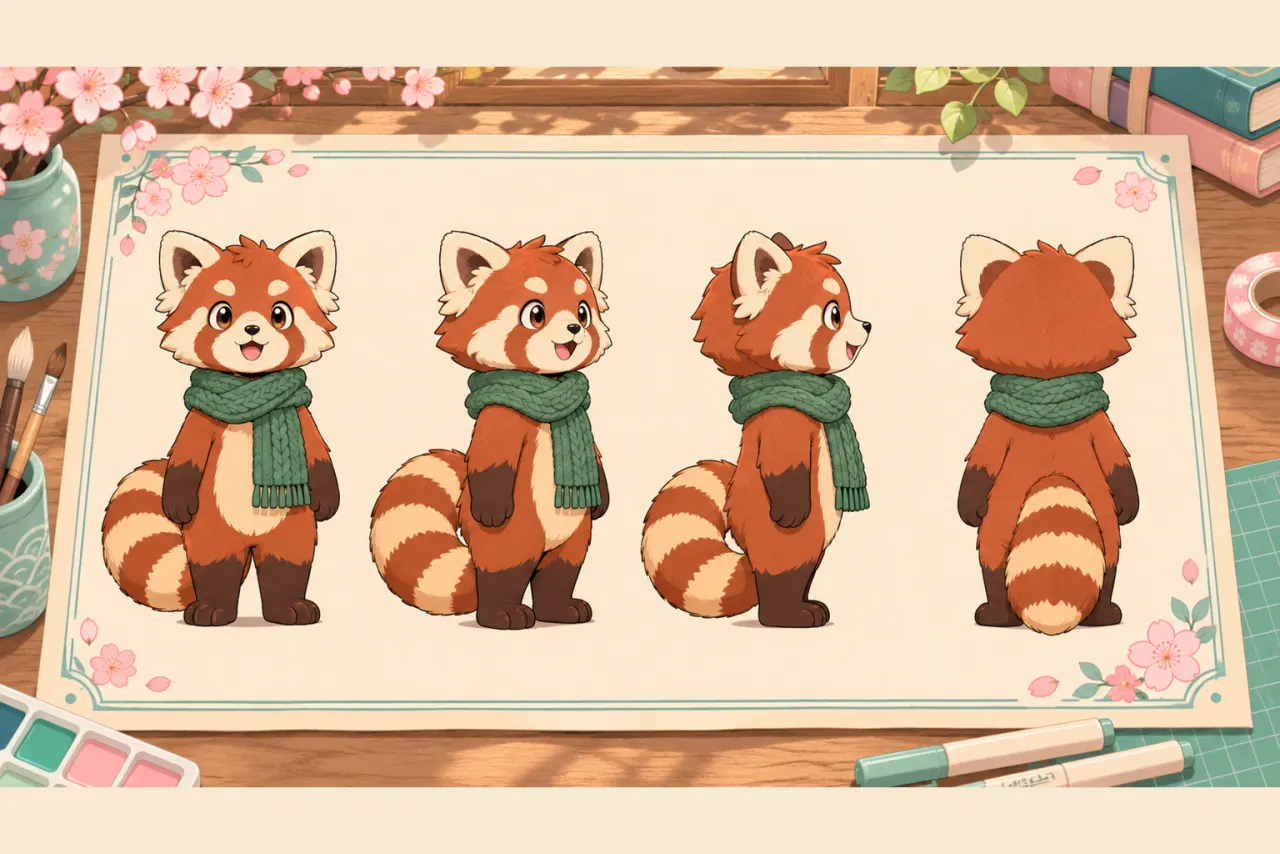
A turnaround sheet answers one question: what does this character look like from every side a story might ask for? One page, one character, several views of the same design in the same neutral pose.
A complete character turnaround sheet usually includes:
- Front view: the face, chest details, and the overall silhouette most people think of first.
- Three-quarter view: how depth actually reads; this is the angle most illustrations use.
- Side view: the profile, including nose shape, posture, how clothing hangs, and the silhouette from another axis.
- Back view: hair from behind, the back of the outfit, and anything the front view hides.
Many studios add a three-quarter back view to complete a five-view set. Game and 3D teams sometimes extend to eight views, one every 45 degrees, or add top-down references. Animation teams may append columns of expressions and separate action poses, but expressions and poses are separate documents with their own jobs. This guide stays on the views.
Turnaround vs. model sheet vs. reference sheet
These terms overlap, and search results mix them freely. A quick map:
| Term | What it emphasizes |
|---|---|
| Turnaround sheet | The same pose rotated through fixed angles |
| Character model sheet | The whole design package: turnarounds, expression thumbnails, scale comparisons, color notes |
| Reference sheet | A working summary, often looser, used by artists collaborating on the same character |
Someone asking for "a model sheet" usually wants the turnaround plus expressions and props. Someone saying "turnaround" means the rotated views specifically. Build the turnaround first either way; every other document reuses it.
The views worth drawing (and the pose to draw them in)
A standard character turnaround sheet uses four views: front, three-quarter, side, back. Add the three-quarter back if your character appears in scenes with real camera movement. Eight-view sets are worth the extra effort only when a 3D modeler or a game engine will consume the sheet, because each added view is another full drawing to keep consistent.
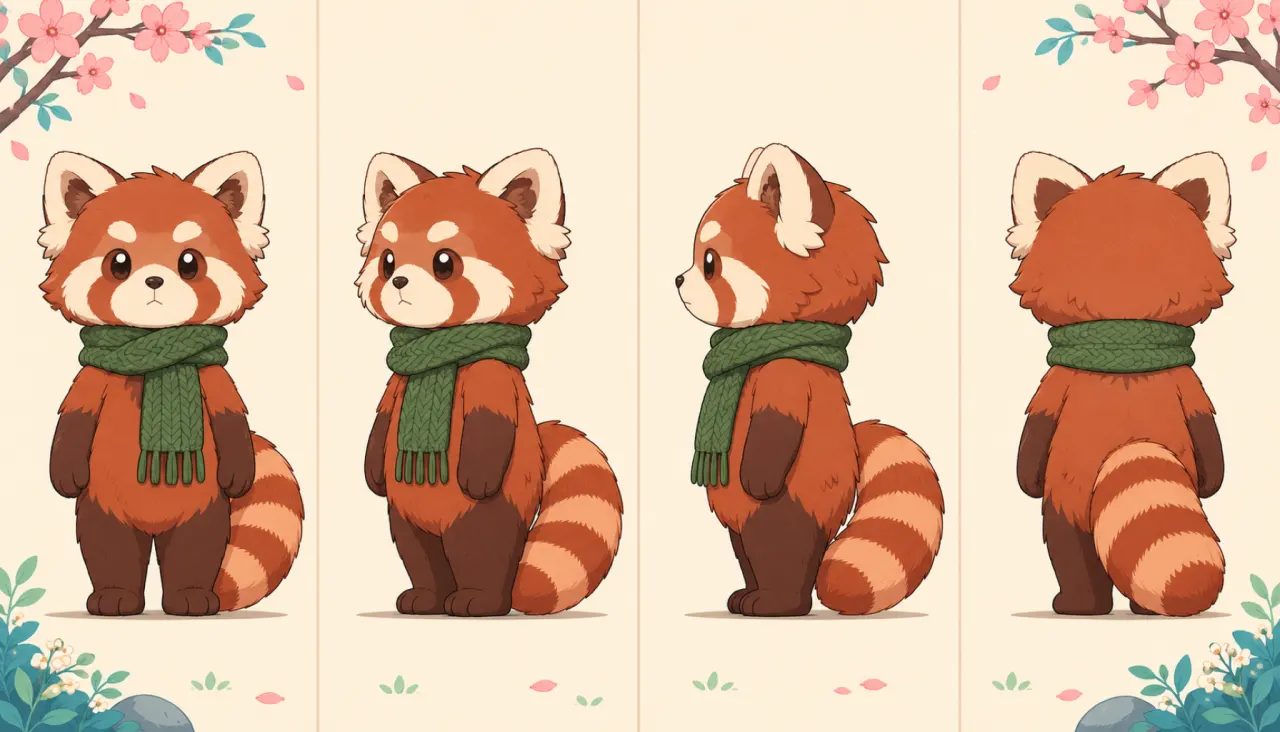
Use a neutral, repeatable pose. The classic choice for production sheets is the T-pose, arms straight out, because it gives riggers clean access to the body. The A-pose, arms angled slightly down, is a gentler variant that distorts shoulders less. For 2D illustration, comics, and children's books, a relaxed standing pose reads better and is easier to keep consistent across views. Whatever you pick, the rule is strict: the same pose in every view, feet at the same baseline, arms in the same position. A waving arm in the front view and a lowered arm in the side view breaks the sheet's whole purpose.
Draw hands and feet in a clear, open position too. Fingers hidden in fists and feet turned sideways look simpler, but they hide information that every later view will need.
Proportion lines: how the views stay comparable
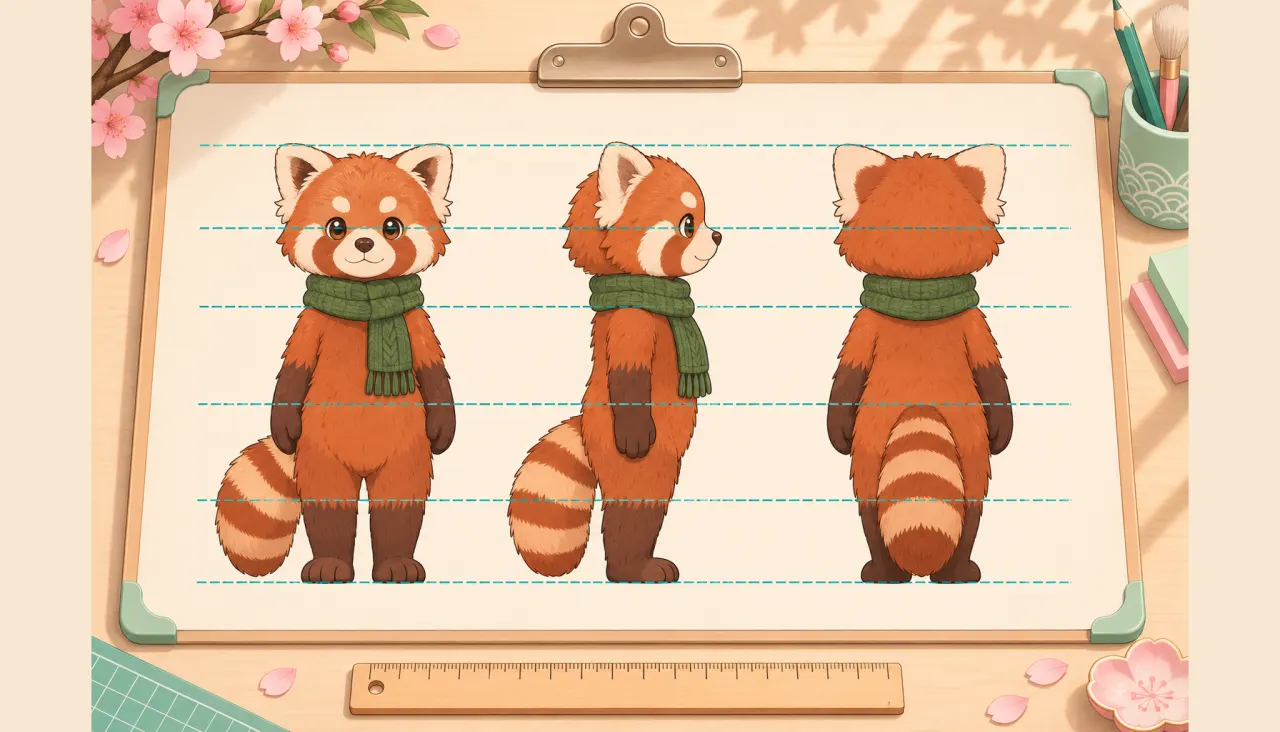
The fastest way to ruin a turnaround sheet is to let each view drift to its own scale. The fix is a shared set of horizontal guide lines running through every view at the same heights:
- Top of the head (use the skull, not the hair, since hairstyles puff and sag)
- Eye line (the most reliable anchor on the face)
- Shoulder line
- Waist or hip line
- Knee line
- Baseline for the feet
Align all views against those lines before you finalize anything. If the eyes sit lower in your side view than in your front view, the character will look like two different people. Record the head count, too: how many head-heights fit between the baseline and the top of the skull. A four-head chibi and a six-head teen are different design languages; write the number down so the next drawing can be checked against it, not guessed.
Professional tutorials agree on this discipline. The walkthrough on Simple Art Tips sketches the front, three-quarter, and side views first, then derives the back views and aligns everything before cleanup. Adem Kaan's guide over at The AK Studio calls the ruler-and-guides step "very important" for exactly this reason. The tools change, whether paper and ruler, Photoshop layers, or a generated reference, but the check does not.
Making a character turnaround sheet with AI, step by step
AI changes the economics of a character turnaround sheet. The slow part was never the concept. It was redrawing the same character five times without drift. An image model with a character reference collapses most of that repetition, and the workflow below keeps you in control of quality. Here is the version we use with the character creator on this site; the sequence transfers to any tool that supports a reusable character reference.
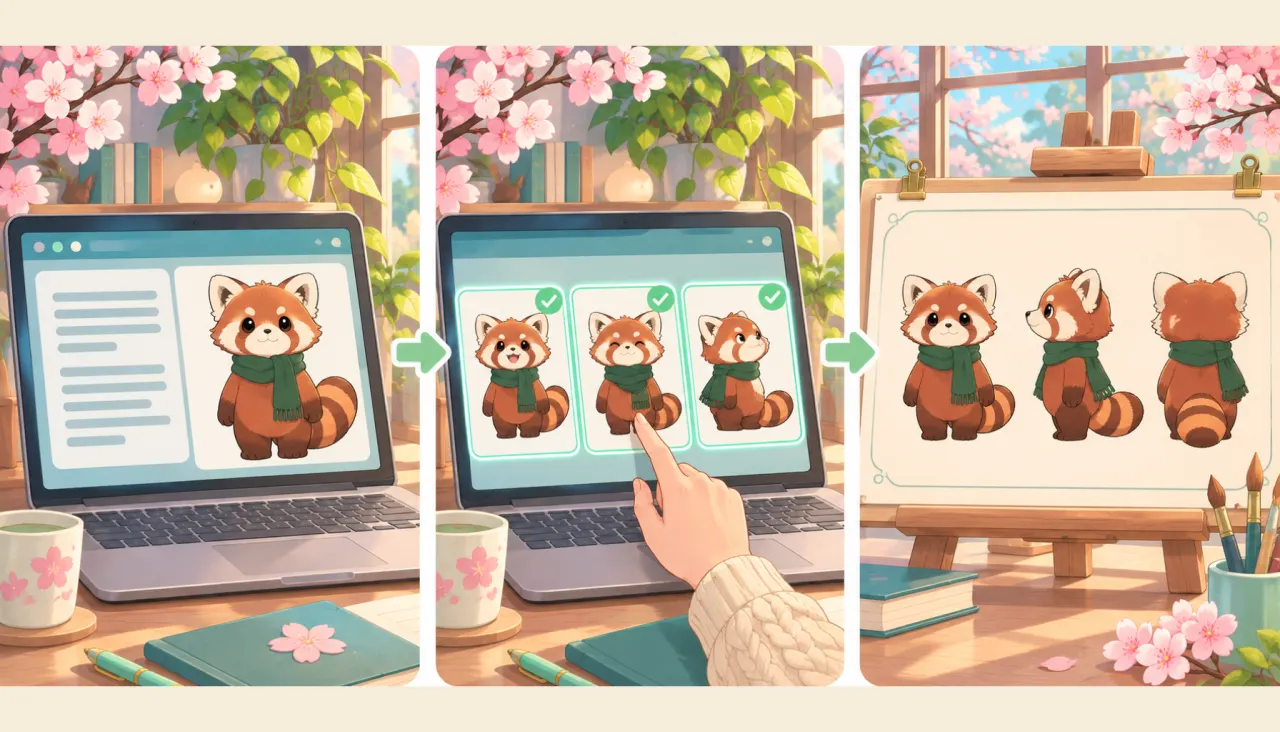
Step 1: build and approve one base design
Generate a single full-body view, front-facing or three-quarter, on a simple background. Judge it as a base design, not as a picture: silhouette readable, proportions deliberate, signature details present. Our walkthrough of how to create an AI cartoon character covers this review in detail, down to the identity-anchor checklist. In this tutorial's example, that base is a small red panda with rust-red fur, a cream face, a striped tail, and a green knitted scarf.
Pick a vertical frame such as 2:3 for this step. Full-body characters need the headroom, and every later view will be compared at this scale.
Step 2: write the identity spec before generating more views
List the details that must survive every view: three to five anchors. For the red panda: rust-red fur, cream face markings, striped tail, green scarf, rounded proportions. Keep the list short enough to audit each result against in seconds. This list, not your memory of the prompt, is what you will compare against.
Step 3: generate the remaining views against the base
Attach the saved base design as the character reference, then request one view at a time:
Same character, exact same outfit and proportions, now seen from the
side (full profile), same neutral standing pose, same scale, simple
background, clean character design.
One view per generation. Batching "side and back views together" invites drift, because the model juggles two instructions at once. Save the character as a reusable asset first if your tool supports it (on this site, that is the Character Asset step), so every request references the same approved design instead of a re-rolled copy.
Step 4: compare each view against the base, not against the last result
Set each new view beside the base and run the acceptance list below. Always compare against the approved base: chain view B from a drifted view A, and the errors compound.
Step 5: assemble the sheet
Place the views left to right (front, three-quarter, side, back) at the same scale on one canvas, with the proportion lines shared across the row. Label the views if anyone else will use the sheet. Export at the largest size you might need; sheets get zoomed.
If you plan to reuse the character in stories, keep generating from the same asset rather than from the assembled image. The guide on making an AI storybook shows how a locked character design carries through scene after scene.
Continuity checks: what to compare in every view
Most character turnaround sheet failures are costume failures. The face survives; the outfit reinvents itself. Run this check on each new view before accepting it:
| Item | What to verify |
|---|---|
| Hair mass and direction | Same volume and part line from every angle; bangs fall the same way |
| Clothing layers | Collars, hems, and seams present on all sides; the back of the outfit matches the front's logic |
| Signature props | The scarf, bag, or weapon appears with the same scale and attachment point |
| Symmetric details | Buttons, patches, and asymmetric elements keep their side (left stays left) |
| Feet and hands | Same footwear design; same hand scale |
| Head count | The view matches the recorded proportion, within a tolerance you can accept |
Two details deserve special suspicion in AI-assisted sheets: asymmetric elements, which models love to mirror onto the wrong side, and anything attached at an unusual point, like a strap that starts at the shoulder in front but at the neck in the side view. Neither fix is hard: name the asymmetry explicitly in the next generation ("the scarf knot stays on her left side"), or clean it up by hand on the final assembly.
The invisible-side problem
When a model infers the back view from a front-facing reference, it is guessing. Most guesses are reasonable: hair continues down the back, a jacket has a back panel. But anything the front view never showed is unconstrained, such as the length of hair hidden behind the shoulders, whether the coat has a belt at the back, or the pattern on a shoe's sole. Character designs with asymmetric backs, capes, or layered outfits suffer most.
Treat every generated back view as a proposal, not a record. Three honest options:
- Specify it. Describe the hidden side in the prompt ("long straight hair reaching the waist down the back, plain coat back with a single seam"). A decision you make beats a default you inherit.
- Draw the correction. Fix the one wrong element on the generated view. This is often a two-minute edit and is standard practice even in studio pipelines.
- Accept the inference and label it. Some projects only need plausible backgrounds, such as a crowd scene or a distant shot. Say so on the sheet itself, so nobody treats an inferred panel as an authoritative design document.
Do not present an inferred back view to a production artist as final. The cost of that shortcut lands later, when the animation reaches the first scene where the character turns around.
From concept sheet to production-ready
A turnaround sheet built this way is a strong concept reference. Whether it is production-ready depends entirely on who consumes it next.
For illustration, comics, storyboards, style exploration, and feeding new generations on this site, the AI-assisted sheet is ready once it passes the acceptance list below. For 3D modeling, the bar is higher: modelers need clean orthographic views, consistent topology expectations, and details a 2D inference cannot provide, such as the actual volume of hair or the cross-section of a prop. A generated sheet gives them a starting reference; it does not replace their modeling pass. If your pipeline requires a rigging-ready model, plan for that modeling step explicitly. The 2D vs 3D animation breakdown on this site shows what changes when a character crosses from drawn frames into a rigged model.
Run this list on every view before you accept it:
| Check | Question | Pass looks like |
|---|---|---|
| Silhouette | Is the outline readable at a glance? | Same recognizable shape as the base design |
| Proportions | Do the guide lines land at the same heights? | Eye, shoulder, waist, knee lines align across views |
| Identity anchors | Are your 3 to 5 spec items present and correct? | Fur, palette, signature props all match the spec |
| Requested view | Is this actually the angle you asked for? | True profile, true back, not another three-quarter |
| Artifacts | Anything broken, duplicated, or garbled? | Clean, single coherent character |
A view that fails identity anchors goes back for regeneration. A view that fails only in one detail, like the scarf knot on the wrong side, is usually faster to fix by hand than to regenerate.
Frequently asked questions
What is the 70/30 rule in character design?
It is a balance guideline: about 70% of the design stays consistent and dominant (the main silhouette, the core palette, the body language), while about 30% carries contrasting accents that add personality, such as an accessory color, an asymmetric detail, or one exaggerated feature. On a turnaround sheet it translates directly into your identity spec: the 70% is what every view must preserve; the 30% is where small variations are tolerable, though an accent detail that flips sides between views still reads as a mistake.
What canvas size should a character turnaround sheet use?
There is no single standard, but a safe choice is a wide canvas, 3000×1500 pixels or larger at 300 DPI if the sheet will be printed, with each view occupying roughly a quarter of the width. For screen-only use, what matters is per-view resolution: generate or draw each view at least 1024 pixels tall so zooming into details stays useful. Horizontal layouts fit how these sheets are read: eyes sweep left to right across the rotations.
Is three views enough for a turnaround sheet?
Often, yes. Front, three-quarter, and side cover most illustration and comic work, and the back can be added later if a scene needs it. The three-quarter back view and the full back matter more when the character frequently turns away from the camera, as in animation, games, and comics with action staging. A missing view found later costs one generation or one drawing; shipping a character with wrong proportions costs a redesign.
Can AI generate a character turnaround sheet from a single image?
It can generate a usable draft of one: modern image models accept a reference image and produce front, side, and back views that keep the character recognizable. The catch is coverage, not style: anything the reference never shows is inferred, so hidden details may shift, and asymmetric designs are the first to drift. Generate view by view against a saved base design, check each result with the acceptance list, and the draft becomes a dependable sheet.
How do I hand a turnaround sheet to a 3D modeler?
Send the full view set (front, side, and back at minimum, aligned on shared proportion lines) plus written notes on head count, palette, and any asymmetric details. Flag which views are drawn references and which are AI-inferred; modelers will plan their topology around the trustworthy panels. For characters that must move and deform, expect the modeler to interpret and rebuild rather than trace, and keep one channel open for questions: a fifteen-minute clarification usually saves days of rework.
Build the base design first
A character turnaround sheet is not a formality. It is the document that makes a character reusable. Lock the proportions with shared guide lines, generate each view against one approved base instead of redrawing from memory, and check costume continuity on every panel before you accept it.
The shortest path starts with one good base design. Open the AI cartoon character generator, create a clear full-body character, save it as your reference, and generate the remaining views one at a time. Turnarounds built this way hold their shape across comics, storybooks, and video. They also make every future request, from "the back view" to "same character, new scene," a small task instead of a redesign.